
Our colleagues at the British Quilt & Stitch Village show need bunting! And LOTS of it! They want to decorate all the buildings and entrance at Uttoxeter racecourse with bunting to create that village show feel.
If you would like to take part, simply make a minimum of 2m (or 6ft) of bunting, any colour, as simple or complicated as you like and send it to Patchwork & Quilting Magazine, Traplet House, Pendragon Close, Malvern, Worcestershire, WR14 1GA to arrive by 1 April 2013. A team at Traplet Publications will choose their favourite length of bunting and the maker will receive a pair of tickets to the show and a surprise package of goodies!
Come to the show and spot your bunting!
There are plenty of tutorials on the web showing you how to make bunting, but here's how I have made mine.

Note: As I am left handed some images may look the wrong way round to most of you!
You will need:
A4 piece of paper
25cm assorted fabrics
1/2" wide double fold bias binding or 2" strips of calico
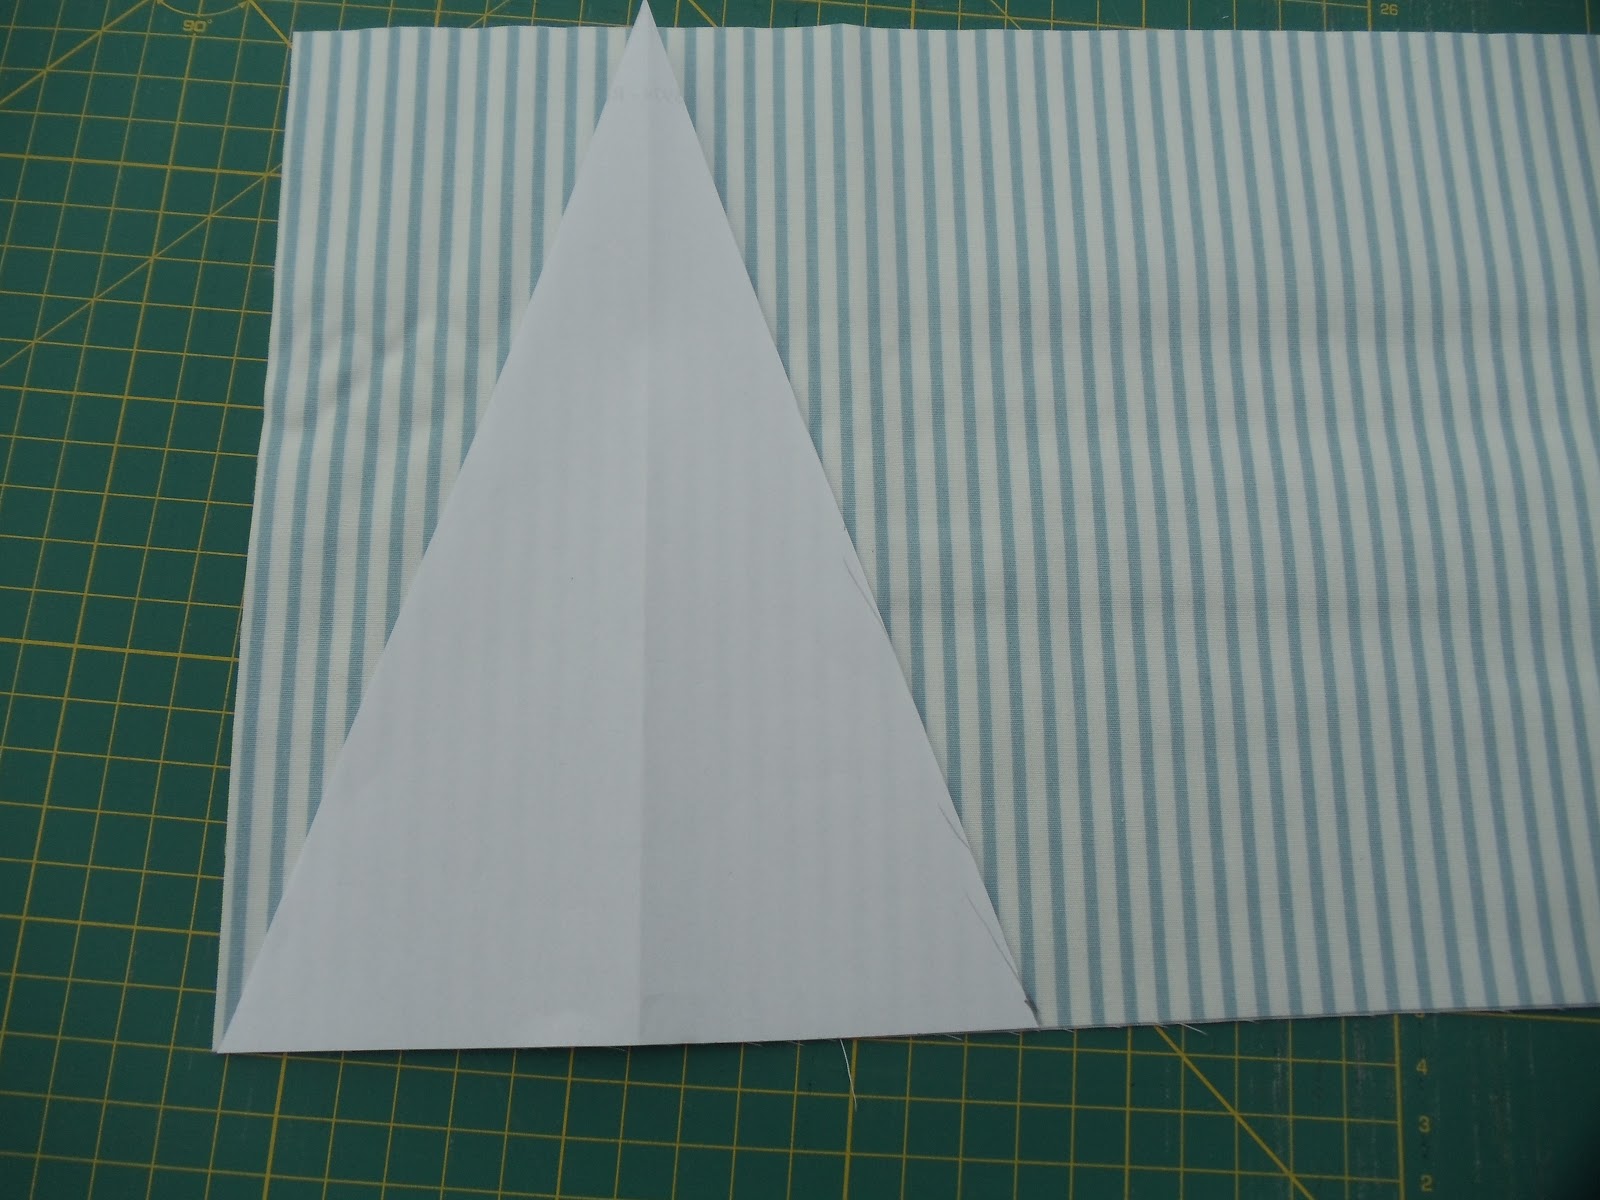
Make a template
1. Take A4 paper and fold in half lengthwise.
2. Cut diagonal line from open corners to fold at bottom.

3. Open out triangle and trim so that it is approx. 8" high.

Make your flags
1. Trim fabric strips so that they are approx. 8" wide. Keep them folded.
2. Place template on one fabric strip and either using a rotary cutter and ruler or pair of scissors, cut around template.

3. Turn template around and cut a second triangle.

(thank you blogger for rotating the image)
4. Continue cutting triangles from your strip. You should be able to cut six pairs from a regular width fabric.
5. You now have a choice of how to make your flags:
a. Put triangles right sides together and stitch a 1/4" seam on both long sides, turn flag right side out and press flat to make a flag like this:

(trim the ears at the top before inserting in the tape)
b. Keep triangles wrong sides together and stitch 1/4" seam on both long sides to make a flag like this:

(thank you again blogger)
6. Continue making flags with all your triangles.
Make the 'string'
Skip this step if you have ready made bias binding
1. Cut several 2" x WOF strips from calico.
2. Join strips together end to end.
3. Fold and press calico strip in half along its length.
4. Open strip out and press and fold each raw edge towards centre fold.

5. Fold strip in half again and press.

Make your bunting
1. Start stitching about 1/8" inch in from open folded edges at end of your folded strip.
2. Make sure you leave a tail of at least 12" before inserting your first flag within the folds of your strip.
3. Insert flag and pin.

4. Continue stitching along folded strip, ensuring all of flag top is within the strip.
5. Add second flag. I left a gap of about 4" between the tops of the flags.

6. Stitch along top of flag as before.
7. Continue adding flags leaving a similar gap between each one, remembering to leave a tail of at least 12" again as you near the end of your folded strip.
8. Add a second line of stitching for additional strength.

9. I made a length of approx. 150" of bunting with 15 flags from 3 long quarters of prints and 4 strips of calico.
And there you have a string of bunting.
Have fun!
Joanna
Thank you for the tutorial, it will would be lovely to see the venue trimmed with bunting.
ReplyDeleteAnd if the sun is shining it will look even lovelier!
ReplyDeleteHow can I get good points after turning the flags right way out! Mine never seem to have nice points!!
ReplyDeleteIt's not easy! And if you look at mine in the photos above (the blue stripe ones) they aren't perfect but it doesn't notice in the grand scheme of things.
ReplyDeleteIf you trim the point before you turn them right side out, that will help. I also trimmed the side seam allowance a little.
It's all about reducing the bulk of seam allowances at that point. You can also use a knitting needle or other useful pointy tool for pushing the point out as far as you can